Heatless regenerative dryers will improve your operation considerably by providing consistently clean, dry air. If you’re looking into buying one, or just purchased one and are wondering “now what?” you’ve come to the right place.
Table of Contents:
1. 5 Pre-Installation Tips for Heatless Desiccant Dryer
3. Installing the Regenerative Drying System
4. Post Installation Tips Maintenance Tips for Desiccant Air Dryers
We’ve compiled this comprehensive guide for installing a regenerative desiccant air dryer.
To know the steps of dryer installation, read on.
5 Pre-Installation Tips for Heatless Desiccant Dryer:
Before jumping right into installing your dryer, there are a few steps that need to be taken to ensure proper installation is accomplished:
1. Choose the area that is best for installing the dryer
It is recommended to install the dryer at least 15 feet from the air compressor. This gives the air a chance to cool and condense before entering the dryer.
2. Choose a spot that is clear of any objects or debris
Obstacles in the area may inhibit accessibility for future maintenance.
3. Measure and cut the air pipes to fit the width of the dryer
If the installation is taking place within an existing airline, measure and cut the air pipes to fit the width of the dryer. Keep in mind the direction of flow; there must be enough room for the pre-filters before the dryer.
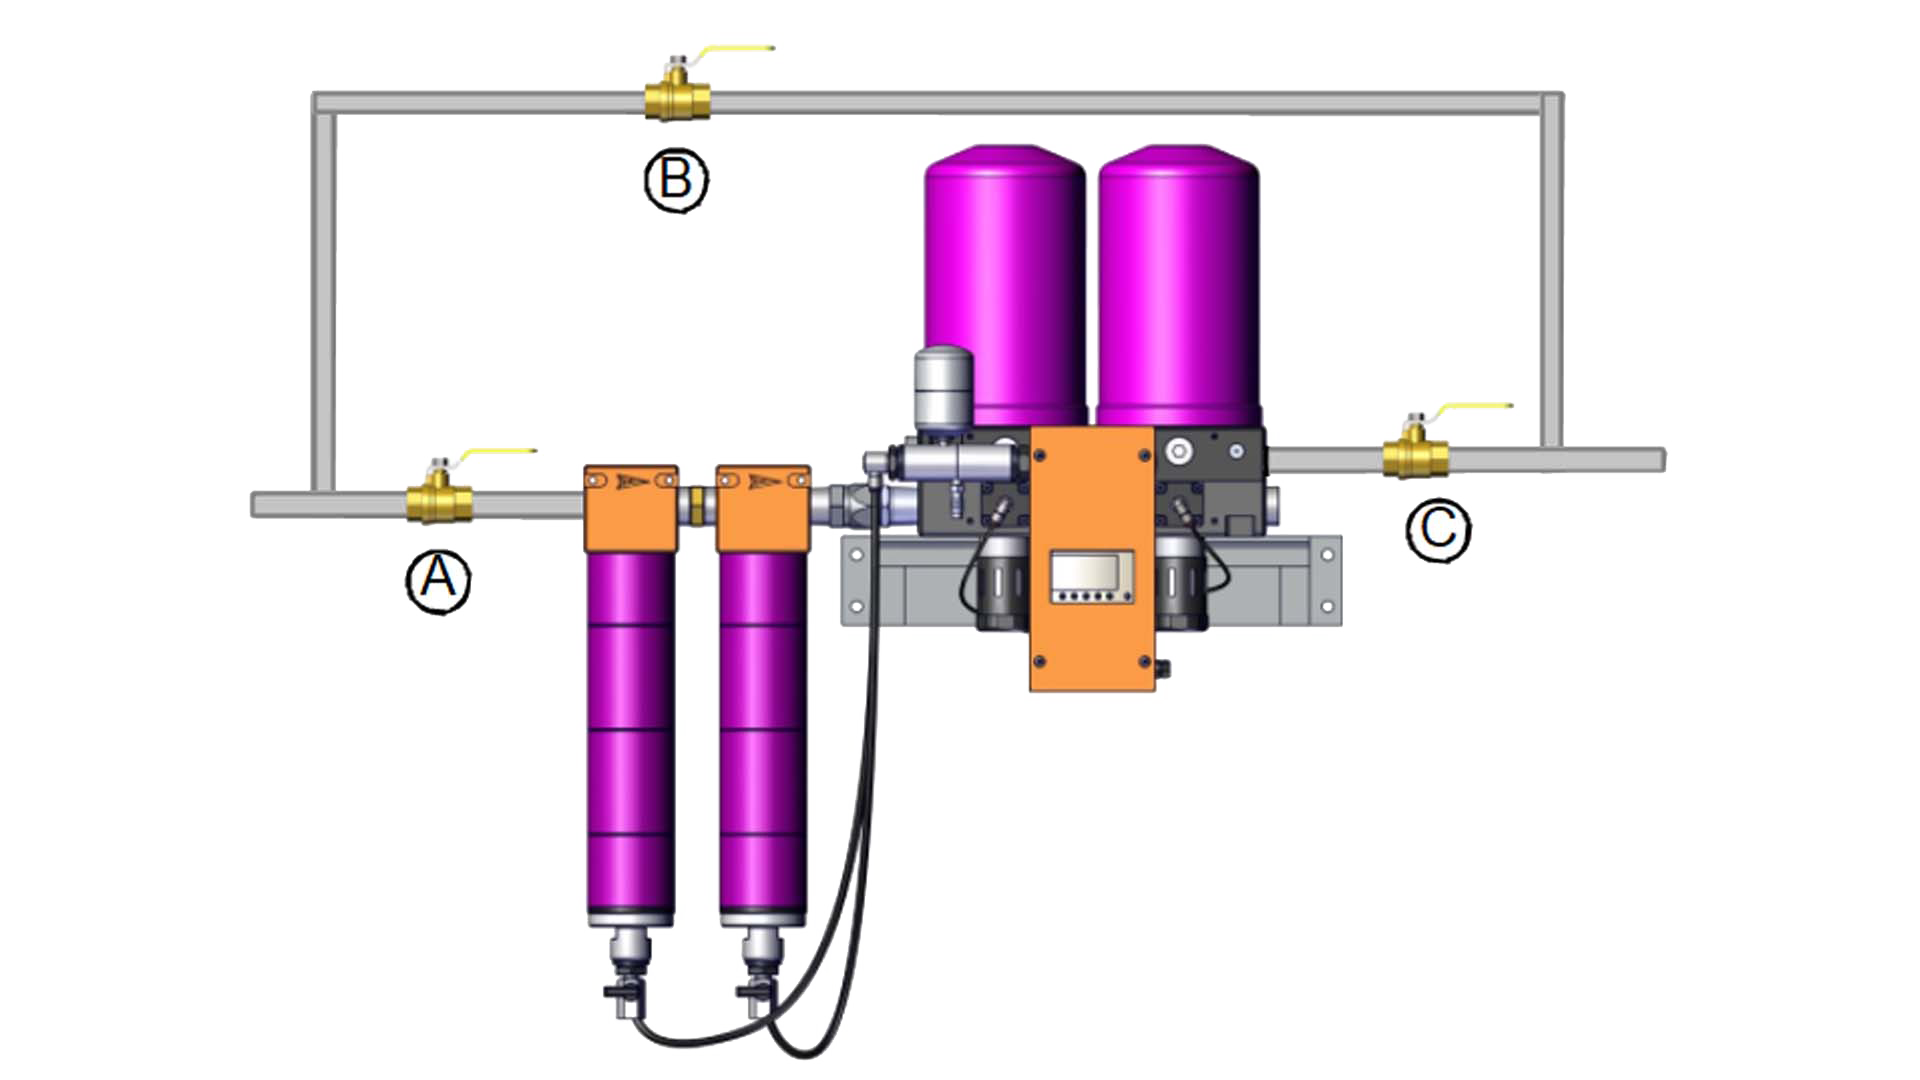
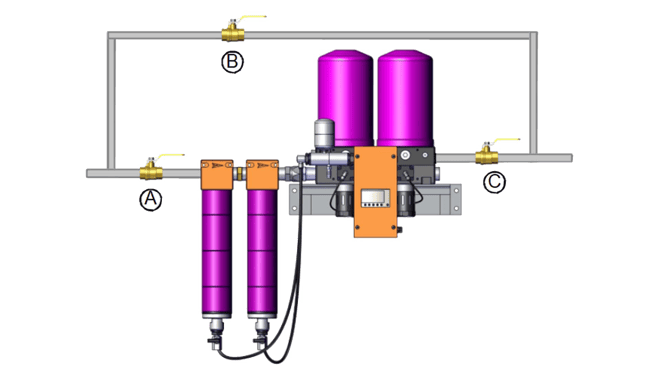
4. Install a bypass circuit around the system
Another tip for future maintenance is to install a bypass circuit around the system. This allows servicing or replacing of the dryer without shutting down the air supply (see below).
5. Shut off the main air supply and drain the lines
Finally, make sure to shut off the main air supply and drain the lines. Depending on the setup, you may want to turn off your air compressor as well.
Now that the air system is discharged, and the area of installation is clear of objects and debris, you are ready to begin installing the dryer. Make sure to have thread sealant readily available.
Installing the Regenerative Drying System:
Now you’re ready to install your regenerative desiccant air dryer! Here’s what to do:
- Mount the bracket to a sturdy wall or another surface. Ensure the surface holding the bracket will support the weight of the system. Check your installation instructions or view the part online to find the corresponding weight and dimensions.
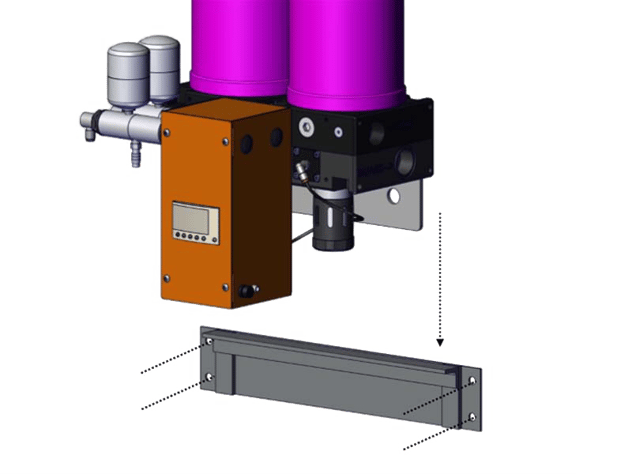
2. Place the dryer into the bracket.
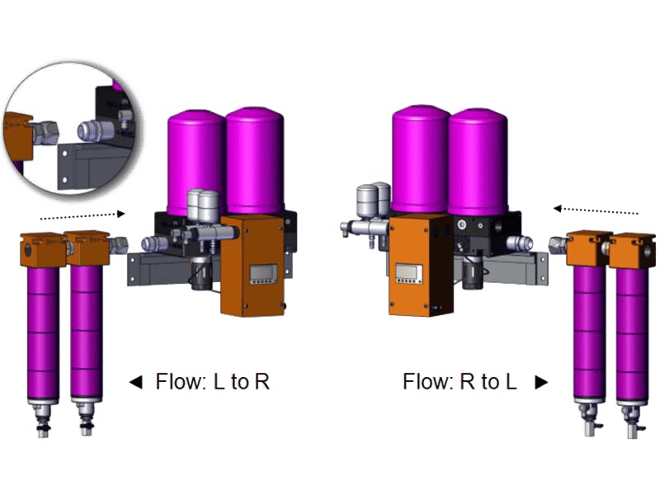
3. Determine the direction of flow based on your air system; connect the JIC fittings to the filter and dryer.
4. Attach the filter package to the dyer using the JIC fitting.
5.Use supplied plugs to close off the unused inlet and outlet ports.
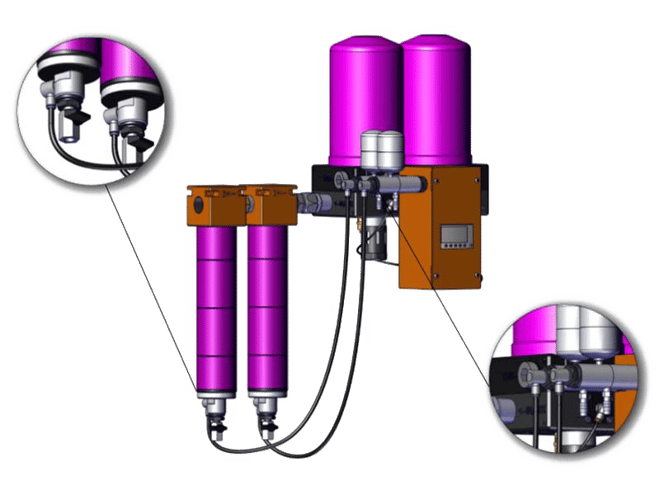
6. If your model comes with pneumatic drains, use the black nylon tubing to make a drainage connection from the bottom of the filters to the Moisture Minder drains (or solenoid timer) on the dryer.
Post-Installation Maintenance Tips for Desiccant Air Dryers:
For Tsunami Air Drying Systems, system longevity and performance can be increased by following the factory recommended maintenance schedule:
- Replace the oil coalescing filter element every six months (mandatory)
- Lubricate the piston spool and piston bore using the grease provided in the replacement element kit (mandatory)
- Replace dryer canister every three years (recommended)
How to Service a Tsunami Oil Coalescing Filter |
How to Service Regenerative Dryer Pistons |
How to Service Tsunami Desiccant Tower |
To learn more about dryer maintenance, read our blog: “Servicing your Tsunami Dryer”
For an easy to review, on-the-go reference, download the printable Tsunami Compressed Air System Diagram by filling out the form here:
For more support, contact a Tsunami representative today.